Tuesday, June 29, 2010

13.

Oh my gosh. Where DOES the time go???

Baby Lu, 9 months

*still my baby* Lu, 13.
today.


Happy Birthday baby girl!

Friday, June 25, 2010

Simplicity 3835 tunic


Well, its finished for now. I foresee some changes to the finished product before I absolutely love it though.

I know I said "dress length" yesterday, but technically I cut somewhere between the dress & tunic length. And its still way short! No way I could wear this without leggings or something. Which makes it a long tunic, not a dress.

Now, to be fair to the pattern, it IS basically a peasant-style dress (i.e. sack) and it pretty much looks like that on me. I was hoping the subtle sideseam shaping and back darts (and minimal gathering for the neckline) would translate into a cute but airy dress (er, tunic) but the truth is...if you have boobage, this dress has to be sack-like everywhere else to accommodate. Sigh.

The sack-ishness is really apparent on the hanger (never a good sign!)


Both the cut and the color reminds me of a housedress my grandma wore when I was little. I always wondered why she wore such an unflattering color, which totally cracks me up now since my family tells me ALL THE TIME how much I'm like her. Heh.

Little quirks I discovered while making this... I made the top version (with elasticated neckline) last summer, and had a tiny bit of "swayback" issue, so I altered the pattern before I cut this out. Well. I ended with a BIG swayback issue anyway. My large booty + high hip fluff needed more room than this dress provided, and I ended up using 1/4 seams over the hip area to make it wearable. It will still require occasional tugging back into place to smooth out the back. (Drat.) I also left out the back darts, in the hopes that would help. (It didn't.)

The neckband is very small. Very. Small. I trimmed at least 1/4 inch off the inside neckband pieces before sewing the facing on because I could tell after trying it on that it was too high and tight. It wasn't "cutting into" me, but it was definitely a fitted neckline. Choke.

After my alteration...it's still too high. If I bend over, it squeezes my front neck. I do have a high rounded back (I'm just a plethora of fun back issues, aren't I? That probably explains the people stopping and staring at the mall.) I didn't make any sort of adjustment for it in this top because I thought it was such an easy fit (and I've already made it. Doh.) Maybe I should have.


See, doesn't look so high & tight, right? Trust me, It's a pretty close fit. I topstitched the neckline because it seemed very plain. Then I wished I hadn't because now it looks uneven with the other side NOT topstitched.

I cut out the floppy bows for the sleeves, but in the end determined to leave them off and went for a turned up & stitched hem. No complaints about the sleeves. I'd read on some other blogs that the sleeve was very tight at the lower end, so I tissue fit and I did have to add to the pattern piece. It fits pretty perfect!


I made a very narrow (1/2") hem on the bottom of the dress/tunic because I was still delusionally thinking I might be able to wear this as a summer dress. HAHAHAHA.


On the plus side, the invisible zip was very easy to insert using my NEW INVISIBLE ZIPPER FOOT!!


Back when I did my podcast interview with Lori, I mentioned that I typically avoid this zip type like the plague because I didn't have the foot and they were too fiddly to put in without it. Well, Lori very sweetly sent me one of her extra invisible zipper feet for my Viking Lily, and then a couple of weeks later the very thoughtful Marie sent me one for my Bernina!

This little dress was put together on the Bernina Activa 220, so Marie's foot was put to good use. And, WOW, you guys were right. Using the right foot makes ALL the difference. Thank you so much Marie & Lori! The sewing community surprises me all the time with its wonderful generosity and kindness. I hope to be able to "pay it forward" soon.

Here's one last shot of the dress on me. Get a good look, I'm considering removing the neckband and applying a simple bias band, and whacking off the length to more of a "top" length.


I still love this pattern, and I even really like this version of the dress. The fit through the neck/shoulder/chest area is really nice. Not too poofy, not too "Imma goin to the squaredance ya'll". It definitely has potential. I just may need to draft my own neckband.

Oh, and underneath, I'm wearing my 2nd muslin of my denim BWOF 2/10/111 pants, but they're not hemmed. You can see threads hanging, haha! Plus, they're a bit of an unflattering length right here. Well, they WERE sliding down off my butt too though, I didn't add the waistband since they were too tight to begin with.

While I sewed up this lovely dress (I love the fabric too much to give up on it yet!) I watched the fabulous Barbara Stanwyck in Balls of Fire (1941) on Netflix streaming.


Really cute film I had never seen. Sort of a "screwball" comedy. A young Dana Andrews has a small role, and I really love him so that was a nice surprise. Gary Cooper, Barbara Stanwyck, SZ Sackall...really do you get much better than that?


Thursday, June 24, 2010

in progress - Simplicity 3835 & BS 2/10

I've been muslining a pair of super-fitted stretch pants (nearly leggings) from Burda Style 2/2010, #111. I saw them on a flickr for the Summer Essentials Sewalong, and decided I must have them. Here's the line drawing:


No, they're not a style that would be particularly flattering for this plus-size girl. No, I don't normally wear my pants quite so fitted (except for leggings that never show). But there's something so chic about these pants. I muslined once in a very stretchy denim, and immediately tossed them. Showed every lump and bump and crevice. Ugh. (They weren't exactly a self-esteem booster.)

The next day I hacked and drew and taped the pattern making changes from the first pair and muslined again in a beefier stretch denim. Ahhh...now we're getting closer. Would I wear them in public without a tunic? Nope. But I can see possibilities. So I added here, split there, taped tissue in places and I'm ready to muslin again. Here's the denim (the 2nd muslin actually).


It's very darkwash, with the perfect stretch. (The denim in the photo above is pretty accurate as far as color, but my grass is NOT chartreuse, haha. I think I had the wrong lighting set on my camera.) I have just enough for one more pair, so my next muslin will be out of unwanted cotton before I cut into the real stuff.

I've also cut out a Simplicity 3835, in the dress length, from my "trees" fabric.


It's stitched together to the point that I'm ready to attach the neckband and the invisible zip:


I really, really love this fabric, so I do NOT want to screw this up. I hope its as cute as I envision it! Hopefully the dress (if not both projects) will be finished today.

Monday I had a school-oriented workshop that was actually pretty fun, and on my way home I stopped at a local flea market to peruse their vintage patterns. No patterns to be found, but I did get these amazing buttons.


Note that not a single button was made in China. No, they were all made in the USA except for the black glass buttons, which were made in France & Germany.


It's funny how one little thing, like the manufacturing origin of these color little buttons, triggers a visceral response.

I recently had the opportunity to watch an HBO documentary called "Schmatta - Rags to Riches to Rags". It was a very enlightening program about the history (and decline) of the garment industry in the United States. If you can catch it on HBO or even a few clips on the HBO site (or *cough* youtube *cough*), I highly, highly recommend it.

I've been struggling for a while now with the purchased clothing concept. And not from a size standpoint (although, being a girl who's a non-standard size, there is that too.) When was the last time you were able to find a mass-produced garment made in your home country? What was the price tag?

Better yet, what's the TRUE price we, as a country (any country), pay for consuming cheap clothing? Is that $6 tee really worth what's happening to us, all around us globally, as a result? For me, the answer is ultimately no.

I can't in good conscious contribute to what greed and profiteering have done to the garment industry. I'm now a label-checker. And its hard, because I'm a bargain shopper by necessity! But I'm also resourceful and lucky in that I can sew my own clothing.

I'm doing some other things as well. Exploring second hand and thrifted clothing, even DIY'ing those pieces that might otherwise be unwearable. Teaching my children about being good stewards of our disposable income, our planet, and about basic human rights.

Along that same vein, I'm participating in the aforementioned Summer Sewing Essentials sealong. My essentials list is quite a bit longer than some, just because I only have time to sew really in the summer, and I'd like to have some transition to fall pieces as well. As soon as I have a proper list or plan sorted out, I'll post more about that.

I've also pledged to join Self-Stitched September. I, Angie.A, sign up as a participant of Self-Stitched-September. I endeavour to wear a minimum of one handmade or refashioned item of clothing every day for the duration of September 2010.

My ultimate goal would be for this to be every day, for the rest of my life! Baby steps.

As long as we're talking about essential clothing pieces, and things to wear "every day"...the February issue of Burda Style is amazingly full of classic, wearable pieces I didn't notice on the first viewing. The above, chic, slim pants. And also this fabulous boatneck tee:

And look, I have this great navy/white striped knit in stash:


There's also this simple a-line skirt:
And a basic "white shirt" pattern too:

A great little pencil skirt:

And not to mention this FABULOUS shirt dress in the plus section:


(The plus section in general is fabulous in this issue with a "Chanel" jacket, a basic trouser, a gorgeous sheath dress, a trench coat, and another great top pattern.)

That's what I love about Burda magazine. An issue can percolate for months (or more) and then WHAM. I'm inspired by everything in it!

Ok, this post is WAY TOO LONG. But if you made it to the end you win a cookie. (Ok, not really, but feel free to go to your cupboard and have a cookie on me.)

Tuesday, June 22, 2010

flagstaff fire

Exactly one year ago, Lu, the G-man and I were in Flagstaff, Arizona for a weeklong vacation. We fell in love with the entire area! You may have seen on the news yesterday and today, that there is a dangerous and very large wildfire just north of Flagstaff.

AP photo

This morning the Schultz fire is more than 10,000 acres and two national monuments are closed because of evacuations in the area. Theses particular monuments were our very favorite from all of the amazing, beautiful, and wonderful things we saw while in Arizona. It saddens me greatly that they are now in danger because of the carelessness of an abandoned campfire.


Sunset Crater Volcano


G-man & Lu on the pueblo trail

Wukoki Pueblo

Wupatki Pueblo National Monument

Our thoughts and prayers are with the firefighters and residents of the area.

Saturday, June 19, 2010

summer shirred skirt tutorial

If you have a yard and a half of cute cotton print, some elastic thread, and oh, say, an afternoon...you can have a cute summery shirred skirt like this:


Let's get started!

First, we'll tear our cotton fabric into front and a back skirt panels. The size of your panels will be determined by your measurements. You'll need to measure your HIP and decide on FINISHED LENGTH (how long you want your skirt to be).

FRONT/BACK PANEL WIDTH: Hip x 2 **If you're making an adult version, you can just tear 2 full-fabric widths for front & back. Because of the way we'll construct the side seams to fit, you can trim away the excess.

FRONT/BACK PANEL LENGTH: Length + seam allowance - ruffle. For example, I wanted a knee length skirt with about a 4" ruffle. I measured from my waist to knee, added 1/2" for seam allowance and subtracted 4" for my ruffle. This is the length of my front/back panels. (Mine was 20.5")

RUFFLE: I wanted a nice, full ruffle that was fairly deep (4"). A good rule of thumb for ruffles is to double the length of the flat fabric you're attaching the ruffle to. Since I started with 2 widths of fabric (skirt front + skirt back), I tore four 4-1/2" strips for my ruffle. (the 1/2" is for seam allowance). **I planned to roll hem my ruffle using my serger, but if you're going to hem the ruffle with your sewing machine, don't forget to add that seam allowance too.

So, for example, my skirt panels were two pieces 20" x 44" for front & back, and 4 strips of 44" that were 4.5" wide.

Now for the fun part!

Step 1: Seam your front & back piece together on one side. Press seam open.


(oops. I was lazy and didn't trim away the selvedge. Hehe.)

Finish the top edge of your skirt. I used the serger to do a rolled hem, but you could do a small turned & stitched hem too. I forgot to take a picture until after I shirred, but here's the top edge of my skirt.


Step 2: Shirring may look complicated and a bit scary, but its really not. It's pretty dang easy, and its sort of soothing to sew all those rows one after the other, in nice, straight lines. Your mind can wander off and the hum of the sewing machine is comforting. Like Mr. Rogers.

To shir, you need elastic thread to wind on your bobbin. It's thicker than regular thread, and is actually a nylon fuzzy fiber wrapped tightly around a cord of elastic. It comes in a package in the notions section of your sewing & craft store. (It will be hanging up with the other precut elastics, not with the yardage to be "cut".)

Most shirring tutorials advise that you hand-wind the elastic onto the bobbin. It sounds like it will take forever, but it really doesn't. The hand-winding is supposed to prevent the elastic from being stretched to capacity from your sewing machine bobbin-winder. (Hint: I'll tell you a secret. Sometimes I'm lazy & use my bobbin-winder anyway. I've never had a problem with doing so. Just go slow. Shhh.)


I usually wind as many bobbins as I can. I can shir 2 rows across 2 full widths of fabric with one bobbin. My finished skirt has 14 rows of shirring. That would be 7 bobbins!! I only had 3 empties which means I still had to stop and rewind bobbins a couple of times.

Load your bobbin just like normal in your machine. I do turn the handwheel one time to catch & pull the thread up and place it under the presser foot. I use regular poly/cotton thread in the needle.

Now, you're going to have to fiddle with your stitch length and your tension. Generally you need to increase your stitch length, and increase your tension. Don't go overboard though. You want to shirring to be sturdy enough to last (it is a garment, after all, and will be washed multiple times). I wouldn't increase your stitch length more than 3.5-4. You will also have to increase the tension a bit, somewhere between 6-8 is usually sufficient.

Hint: My settings on the Bernina Activa 220 for this skirt: Stitch Length 3.0; Tension 8

Begin stitching, placing your first line of stitching approximately 1/2" from the hem edge. You can use your regular sewing bed markings for this initial row, but from here on out you will be using your presser foot edge as a guide. Stitch, Stitch, Stitch, lining up each row so that the previous row is on the edge of your presser foot.

Hint: I backstitch at the beginning and end of each row (tutorials vary on this step, but I always feel more secure with a backstitch!) You can also leave thread "tails" to tie into a secure knot at the end of each row.

Your first and even second or third row, you may see very little change in your fabric. You might even suspect its not working right (it's not drawing up enough). Trust me, the more rows you sew, the more the shirring effect will happen. Just keep going. (**There's also a magic step at the end! Of course. I like magic!)

Hint: Two full widths of fabric can be a little unwieldy, so what I do is roll up the fabric so that I only have the leading edge & about 10" or so to deal with. Then, as I sew the line of stitching, I unroll the next 10" or so as necessary. I also pull the fabric flat as it passes under the needle.

Here's the "magic"...Steam! When all finished, with a nice, hot iron, steam the bejeezus out of your shirring. Just hover your iron, don't "touch" the threads. You'll see it immediately begin to draw up into nice, tight shirring.


Here's your finished shirring from the front:


And from the back:


So...how many rows to sew?? Well, you might have to do a little math, but I just eyeballed it. Actually, 10 rows was probably sufficient for this little skirt. That made an approximately 4" waistband of shirring. I added a few more rows because I had the insane idea that I could make this a dual garment, functioning sometimes as a "top" and sometimes as a "skirt".

I have too much boobage for that it would seem. So I stopped the madness at 14 rows.

Step 3: Now let's get busy on that ruffle! Seam all of your ruffle strips together. You'll have one, gigantically long strip of fabric. And you'll be cursing me at the thought of all those basting stitches to gather up by hand. Ugh. But wait! I have more magic for you!

It's called a gathering foot. Get thyself to the sewing machine dealer pronto and buy one. Mine looks like this:


I heart mine. Alot.

Before we can gather, though, we need to take care of those raw hem edges on the ruffle. Again, I used the serger to do a roll hem. Nice and tidy (and FAST):

yards and yards of rolled hem ruffle

Now put your gathering foot on and again, we'll play with tension and stitch length to make it work. The longer the stitch length and the higher the tension, the more gathering effect you will get. I've been using my foot for a while, so I can judge pretty well the way different weights of fabric will gather (lightweight fabric gathers up more/tighter than heavier or beefier fabrics).

Hint: My settings: Tension 7, Stitch Length 4.0

I used the 3/8" marking on my machine bed to line up the raw edge of the fabric (you could use your presser foot edge too) and begin stitching. There is no magic final step here, so if its not gathering up enough, try a longer stitch and/or higher tension. (If you can't access a gathering foot, then I'm afraid you'll have to gather the old fashioned way! Curses!)

You'll end up, very quickly I might add, with this:


Hint: I always press my gathers before stitching them to the next piece of fabric. It makes everything lay nice & flat and its much easier to see what you're doing when stitching!


Step 4: Stitch the ruffle to the bottom of your skirt front/back panel, right sides together.


Finish the seam. I used a serged edge, but you could use a wide zigzag too.


Step 5: Now it's time to sew up your last side seam! Almost finished! "Try on" your skirt, to see where you need to stitch the side seam. Your elasticity from shirring (and your machine's tension, fabric type, etc) may vary quite a bit from garment to garment, so pin it on. You want the skirt to be snug enough at the waist so that it doesn't fall off at some inopportune time.

Say, at church. Or in line at the movies.

When you find that "perfect snugness", pin carefully and step out of your skirt. Finish pinning down the entire side seam to ensure all the edges line up: front/back of shirring match, front/back ruffle seam matches, front/back hem edge matches.


If you're like me and used 2 full widths of fabric, you might end up trimming away quite a bit of edge (I trimmed away about 2" from each edge). If you'll be trimming away shirred portions, then you will need to reinforce those areas before cutting, so that all your hard work (elastic thread) doesn't come "undone".

I stitched three lines of straight stitching, right next to each other, in what would become the new "seam allowance" of my side seams. In other words, I stitched right outside of where I pinned to fit, perpendicular to the shirring lines. This stitching will catch and anchor the shirring so that it won't come undone later.

Step 6: Stitch your side seams with a straight stitch. Don't forget to put your regular foot back on and change your tension settings/stitch length to normal first!

Finish the seam. I used my serger.


Step 7: A special hint for you sergers-ers out there. When you're making a garment like this, where the edge of your serging won't be caught in another seam, what do you do with the tail that's left over??


Your serger manual probably tells you to use a bodkin or something to weave the tail into the serged seam. Of course, in my experience, this tends to work its way back out over time, or is next to impossible to do. Here's what I do instead. I cut the tail to approximately 1" and fold it back along the seam, inside the seam allowance like this:


Using the regular sewing machine and a wide zigzag, I catch the serger tail in the zig and the seam allowance edge in the zag. I zigzag along the serger tail for a bit and voila. It's neatly taken care of and will never come undone!

Step Finished! And that my friends, is all there is to it! Now you can go out and wear your cute new skirt!


(And hopefully your legs aren't as pasty pale as mine.)

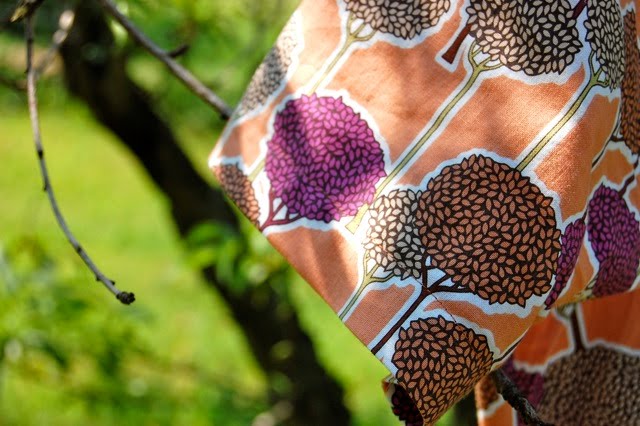
ps...The fabric used in my skirt is from the fabulous Jennifer Paganelli's Sis Boom line.

Friday, June 18, 2010

little things.

Oklahoma in June = wet, heat, and humidity. It's like living in my own little terrarium.

Bonus? When I'm hanging out laundry (or possibly, lying on a blanket in the shade waiting for the laundry to be dry), I happen upon little things like this...


If you were a Little Person, wouldn't you choose just this mushroom to build a little house under? Look at your yard, covered in cheery shamrocks. A lucky yard.

Of course, living under a mushroom is bound to have it's downsides. Like, oh, say... INVASION.

sniff sniff sniff...


snuffle snuffle snuffle...


Whew. Tragedy averted.


Priscilla: "What?"


When I was a little girl, my uncle used to tell me stories about the Little People, a Cherokee legend. (Of course he often peppered his version with tales of the mean variety of Littles, which meant my fascination was a bit breathless anticipation and LOOK-OUT-BEHIND-YOU! fear. Uncles.)

I spent many a summer afternoon playing in the woods behind my house, and I would watch close about me, trying to catch a glimpse. But I was never successful.

In my head, the Little People were teeny, tiny beings, like Thumbelina (one of my very favorite fairy tales!) They lived in a scaled down version of my world, with soft green moss as their yard and wild violets for trees.

And when it was hot, and humid, and mid-June...they lived in mushroom houses.