Showing posts with label pants. Show all posts

Friday, July 02, 2010

Vtg Simplicity 1230

Shorts recap: Yesterday, on a lark, I decided to muslin this great vintage Simplicity pattern in my stash:


Here are the finished shorts (front view) in a peachy-pink linen:


Side view: (which I rarely take a photo of! You're going to get my side AND back view. You're so lucky.)


And because I never know where to place my arm in a side view (leading to aLOT of awkward photos, another reason I rarely bother):


You can see the curve of my backside better with my arm up. I'm happy my bum doesn't look quite as flat in these as in most pants. :D

Back view:
The back does show a tiny wedge that needs to be removed for a bit of swayback. I have now made that alteration on the back pattern piece. I didn't see it in the muslin, but I didn't fully complete the waistband, so it's possible I had the muslin pulled up too high in back.

But other than that, the back is fairly perfect. Let me tell you, starting with a pattern that nearly fits is SO much easier to fine tune! Because of a weird vertical fold near the center back, I scooped the back crotch about 3/4" (in 1/4" increments until I felt it was perfect, and still really comfortable). I tapered that change up the CB seam, to about the level of the bottom of the dart. I pinned this in first and tried on (wrong side out, pins on outside). Then I basted it and checked again. That's it for the back. I didn't make any other changes.

For the front, I deepened the crotch seam about 1/4" (and after I sewed the muslin, I had done a fisheye dart to remove some crotch length in the front).

This pair has 1/2" removed around the entire top (front and back). I'll probably go ahead and remove that from the pattern piece, because I love the fit and where the waistband hits.

So let's go through some details... The front of the shorts have stitched-down pleats, which I LOVE. They are just soooo 1940s. Pretty much ever authentic 40s photo of women in trousers I have seen feature these topstitched pleats.


The back also features one topstitched pleat, but I did a long dart. It was actually a mistake when I was tracing; I marked dots that seemed to be a "dart", but in fact the lowest marking was something else. I like the dart though, I don't think I would get as nice a fit in the derriere with a topstitched pleat, so I made the change permanent on my pattern.


This pattern called for snap closures (which I've seen called "poppers" or "studs" in vintage patterns) along the side seam, but I inserted a lapped zipper. The waistband was my 2nd version. The first was too narrow (I didn't use the pattern piece for this straight waistband, but tore a strip approximately the right length & width). It looked very 1980s. So off it came and the 2nd one is a tad too wide. But its growing on me.


The seam finish recommended was straight stitching along the seam allowance and pinking, which I might have tried if my pinking shears didn't need a good sharpening. I straight stitched seams, and zigzagged seam allowances together. I do have a serger, but not the right color of thread. I finished seams like this for years before I had a serger, so I know its sturdy.

I encased the raw edge of the waistband with Seams Great, zigzagging on.


I left enough for a deep hem. I wanted more weight to the hem because of the fullness of the legs (and my chubby thighs). I'd like the shorts to remain in proper position as much as possible. The hem is turned under 1/4" and again 2" and stitched.


And because someone usually asks about my shoes, I took a closer picture of them too! I'm such a shoe whore. (Sorry, it's true.) These incredible summer wedges are from Modcloth. Gorgeous! I think they are just modern enough but still have a retro twist.


Another parting shot of the shorts, after I had walked around and taken LOTS of photos. They still look great! I can see lots more of this pattern in my future!


This post is cross posted at We Sew Vintage!

Thursday, July 01, 2010

vintage trousers.

This post is part nostalgic trouser lesson and part vintage pattern tutorial!


I decided to experiment this morning with this adorable vintage pajama/lounge pattern from the mid 1940s. I've been wanting some cute, high-waisted shorts for the summer heat. (I debated trying out the "Marlene Dietrich" trouser/bermuda pattern from a recent Ottobre Woman, but none of the garment photos were really that flattering. Not the best incentive.)

Vintage pant patterns for women are scarce (as you probably know if you sew vintage!) Before WWII, trousers were more than a little scandalous for women. During the war due to rationing and factory work, trousers became more of a necessity; how much do we still love Rosie the Riveter?


Pants thus began to worm their way into female fashion. It would still take more than 15 years before pants were really considered a necessary or regular part of women's wardrobes.

You can't discount the influence of early Hollywood either. Even today we refer to high waist, full leg trousers as "Marlene Dietrich" pants. She was one of the first stars to wear pants in films during the 1930s, then continued wearing trousers outside of her movie roles (and it was quite a scandal too!)


Katherine Hepburn is the other film actress most often associated with introducing trousers into womens' fashions.


I do think it is misstating things a bit to say that Dietrich and Hepburn "popularized" pants for women. They were simply the first to wear them in such a public way (along with, of course, Amelia Earhart, who could hardly fly a biplane in a dress.) Pants wouldn't really be popular (nor allowed in all public venues) for a few decades. (And I love Hepburn, but Dietrich has always left me cold.)

As for pant patterns from the 1930s and 1940s, while we love and covet them now, I can't imagine these were hot sellers, as mainstream America wasn't quite ready for the idea. These patterns were probably never reprinted, and most likely had a very small initial circulation to begin with. I have never had the opportunity to see (in person) a 1930s trouser pattern for women.

However, there is this great reproduction pattern from c. 1933 is from EvaDress:


On the other hand, if you long for that authentic 1940s trouser, here's a little tip/secret (which you already know if you listened to my podcast interview with Lori in April): There are many vintage pajama/lounge patterns available in a variety of sizes that actually feature that same trouser silhouette. Even though they were essentially for sleeping, the pajama pants in the two or three patterns that I have from the era are quite detailed. They feature pleats, darts, a fitted waistband and closure; details just as you would find in a regular "trouser".


After I remembered this vintage pattern lying in my stash this morning, on a lark, I decided to muslin the shorts (view 3).


My pattern is NOT in my hip measurement. My hips are 8 inches larger. (Eight!!) Adjustments would be necessary. It may be tempting to just pin and hack and tape away at these vintage patterns, especially if you luck onto a factory-folded one in pristine condition. HOWEVER...bear in mind that these patterns are upwards of 70 years old. They're more fragile than they look. While I think they should most definitely be used and enjoyed, I also try to preserve them for future generations.

That means I trace each piece and carefully replace original tissue patterns to the package. If the guide sheet is in poor shape, I will also copy that (my printer does that at home.) Patterns from the 1940s will often be unprinted; that means you'll have to adjust your thinking about pattern markings. Without printed markings, look instead for punched holes (small and large) and punched notches. The guidesheet will have a "key" telling you what each dot size and notch means. Read that first.


Also look for the seam allowance listed in the guide sheet. It will be different from modern patterns! For example, for my trousers, the side seams are 3/4" to allow for fitting adjustments (built in!! woohoo!) but for the remainder of the pattern the seam allowance is 1/2" (so 1/8" smaller than today's commercial pattern). Write it on your tracing, you won't remember. I promise.


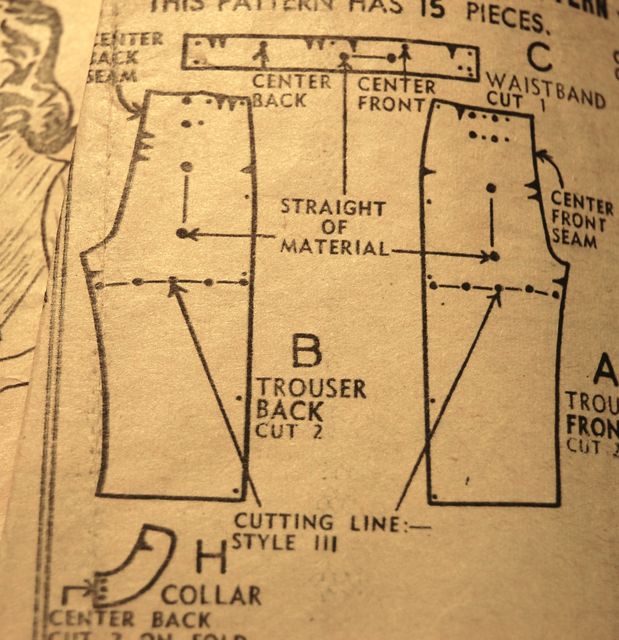
Vintage, high-waist trousers are VERY high-waisted. The crotch length will be so long that you might be unsure which end is the crotch and which is the leg, especially if you're doing a short. I'm not kidding:


Hopefully there are darts or pleats to orient you later.

For my shorts, I decided to simplify things by making a straight muslin, as drafted. The ONLY adjustment I made to the pattern was to add 2 inches to each side seam (my hip difference). I was SOOOO tempted to do my usual pant adjustments.

(Sidenote...here are my own body quirks/pant adjustments I normally make/fiddle with on current pant patterns: add for full and high hips, lengthen back crotch, flattish yet full bottom/scoop out back crotch, lower center front waist, add 1/2" to front side seam at waist for tummy, full inner thighs). Quite a list, huh? I might get a decent pant after fiddling with most of these.

But I abstained from any adjustments and did a quick & dirty muslin in an ugly banana print cotton woven.

They're perfect. I'm serious. I need a tiny fisheye dart removed from the front crotch about mid-way, and that's it. My butt looks fabulous. I've NEVER gotten such a good fit, ever (not from Burda or Ottobre or any pattern bar none).

Soo...I'm off now to cut out a "real" pair in a dusty coral linen. I'll still be making the shorts length, but I can't wait to do a full trouser length too! I'll share more pictures and details in the next post!

I was so excited, I had to share now without pictures, haha!

Stay tuned...

Saturday, June 12, 2010

cheeky pj pants.

I say, if you're going to be home all summer in your pj pants anyway (i.e. NOT WORKING. NANNER NANNER.), they may as well be freakishly CUTE pj pants.


Am I right or am I right?

Pattern used: Simplicity 5074, my favorite drawstring/pull on pant pattern. It just fits, no tweaking.

Fabric: The previously mentioned Laura Ashley-esque blue rose print (which I've had in stash since Lu was a baby. Ahem.)

Too old for ruffly legged pants? Naaaahhhh. Besides, you can't be shy about things like a grown up woman in her 30s wearing floral print ruffly capri's. Go big or go home, I say. Besides, I love the swishy way they move when I do my rendition of Swan Lake across the backyard.


The ruffle is one layer so that it is lightweight with lots of movement, the edge turned under twice & topstitched for hem.


I added the drawstring waist using the elastic in back/drawstring in front method (with buttonholes in the front for the drawstrings to run through).


But the absolute best part? The cheeky little secret?? (You mean it gets better than Laura Ashley-esque floral and ruffles??) Yup. A polka dotted rickrack'ed back pocket.


It's like a little vintage apron on my bum.

Here's a closer view of the pocket, two dotty prints and vintage pink cotton rickrack.


No pattern used for the pocket piece. I just freehanded a rounded edge patch pocket, and widened it so I could gather it up nice and sweet at the top edge. The tiny binding is a strip of yellow dots from a jelly roll. Since it's a straight edge across the top of the pocket, no need to use actual bias!


And that's what Chris Pine & I did yesterday afternoon while catching up over Star Trek.

I really heart summer.

Sunday, May 09, 2010

Simplicity 3849 - Jr's

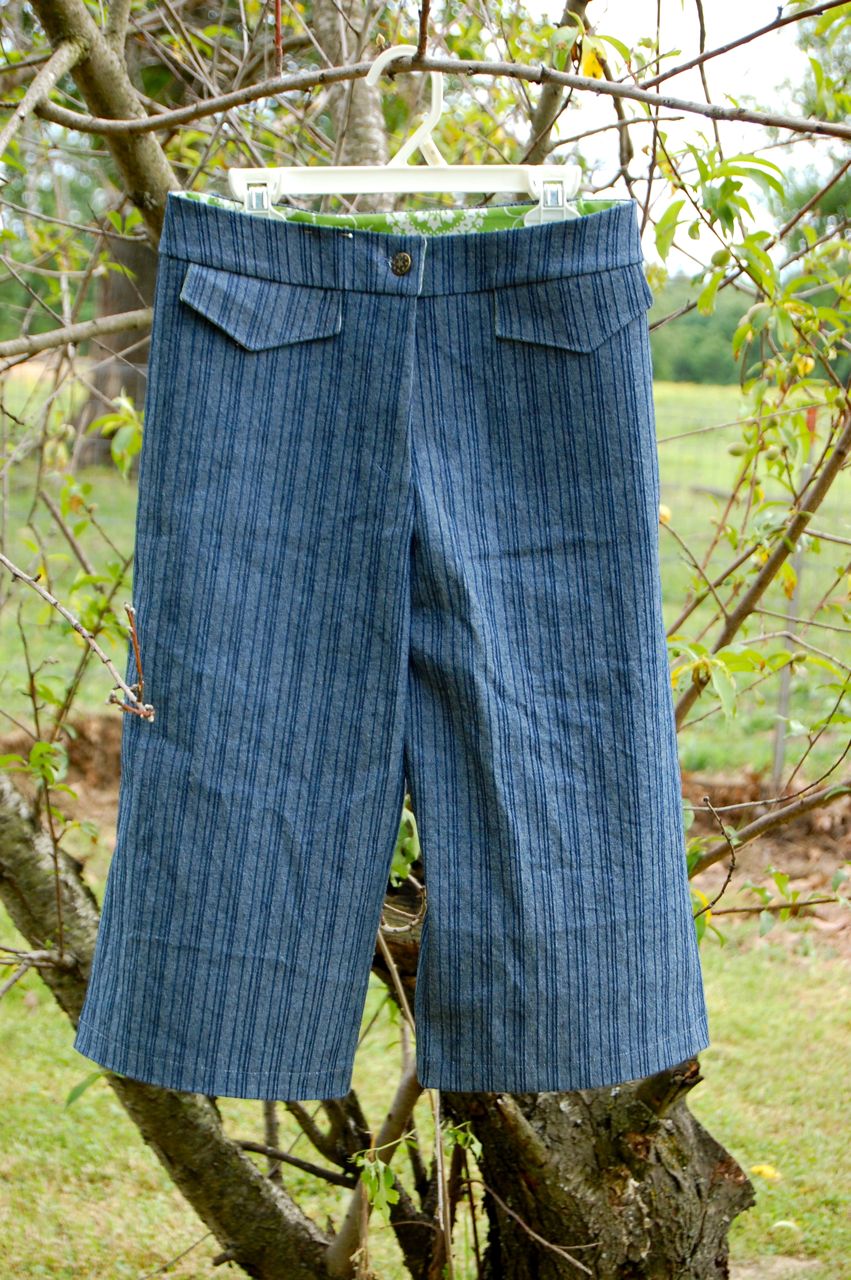
A project for Lu this weekend, a pair of capri's from this Simplicity Jr. Trend pattern:


I made view B without the cuff/tab in a stretch denim. The denim has a woven stripe, and is pretty darn stretchy. I'm afraid they'll outgrow Lu after she wears them an hour or two! Excuse the wrinkly legs...I should have pressed them again before taking pictures!


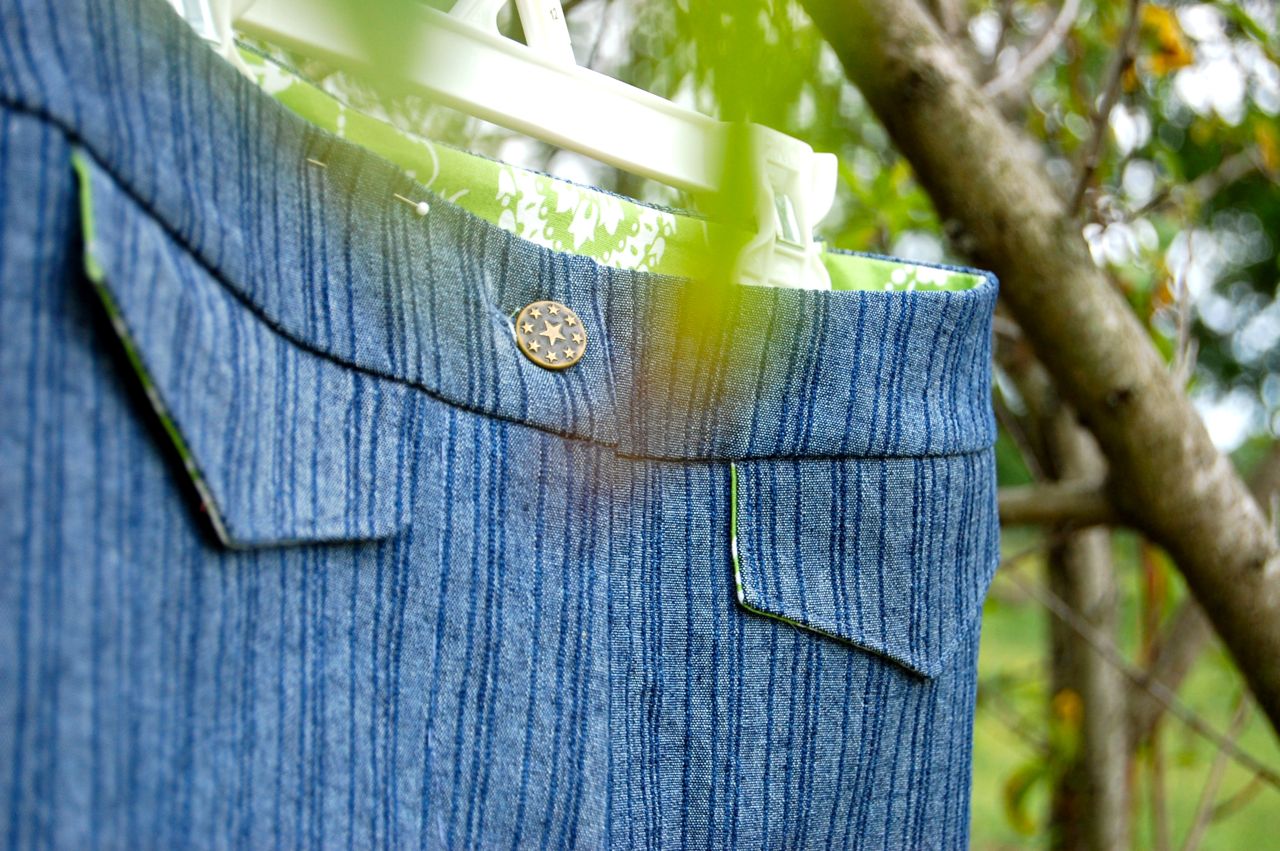
Lu got to pick out a fabric for the pocket tab facings, waist facings, and fly. She chose a cute lime Sis Boom quilting cotton. I'm sadly almost out of this now. I've been hoarding it! The fly & waist:


And the faux pocket flaps are also lined in the green print:


I used a denim button/nail for the closing, and I skipped any extra topstitching. Mainly because Lu isn't a fan of wearing handmade items just now, and I'm not positive she'll wear these (even though she asked for them and helped pick out fabrics). No sense in spending valuable sewing time topstitching a garment that will never see the light of day!


They are somewhat looser fitting than the cover photo would have you believe. The legs are quite wide. I cut the size that matched her hip measurement, and ended up taking them in about 1/2" at the side seams, but they're still somewhat loose. They're also meant to be worn 1-1/2" below the waist, which if you have a booty (Lu does) doesn't leave a lot of room in back. I should have raised the back waist a bit, and will if I make them again. We'll just wait and see if these get worn first!

While I was in the back yard photographing the peach tree again, I snapped a shot of Lu's little garden. She has tomato plants and lettuce (and squash, but no sign of that yet):


And I was very excited today to discover my wisteria is blooming!! It didn't last year and I was afraid the ice storms had killed it. It's so high up in a tree right now, I almost missed it! There were a few branches low enough I could snip some blooms and bring them in the house though. It smells SOOO good. (Unfortunately I'm allergic, so I suffer for having it in a vase. I keep it in another room, haha.)


And my red roses are blooming. A few of these were snipped and joined the wisteria in the vase.


The sun went down while I was out with the camera, making a pretty spectacle of my field...


I didn't get out much this weekend, I've been under the weather (and still feel a little crappy to tell you the truth.) But it was a good Mom's Day, and I enjoyed the pretty (if cool) weather. I hope all of you had a wonderful Mother's Day too!

Thursday, July 23, 2009

Burda Plus#402

I have crappy pictures to share! Yay!

These are the plain front trousers from Burda Plus issue E952 (Spring 07, I think), pattern #402. Just a note about this great pattern. It's in the "Plus" issue, but for those of you unfamiliar with these special issues of Burda Fashion magazines, the sizing begins at 44 for most patterns (just like in the BWOF plus section), which is also on the higher end of regular sizes. That opens up these patterns to many more sewists! Here's the line drawing:

I didn't have quite enough of this tobacco twill to make full length pants, so I shortened the pattern to capri's. I had been crawling around the floor looking for something before taking these pictures, so excuse the messy, wrinkly appearance. Fit from the front is pretty perfect:


And the dreaded back view. ;) This one's not so bad though. Other than my high right hip (which I typically ignore since I can't see it), which has a few wrinkles pointing to it. Look in particular at my waistband, which is pulled over 1/4-1/2" to the right. I never realized my pants did that.


This pattern fits marvelously, almost right out of the magazine. I did a muslin using old quilting cotton I wasn't going to use, and tweaked the pattern with the following changes: added a bit at my front hip edge (always have to adjust for that no longer flat stomach. Damn thirties anyway); Minott method for full inner thighs (using Debbie's fabulous tutorial); extended the front crotch 1/2" (the front crotch on this pattern is really short).

After I made the second muslin (in this tobacco twill) I went back and lowered the crotch seam about 3/8" to fix a bit of pulling there. Here's a diagram of my changes. I know it looks like I changed alot, but really these are very minor changes for a pants pattern!!
I used a cute orange floral cotton for the waistband facing (rather than bulky twill):


And I used the same cute print as my fly shield:


I'm pretty excited to give these a try in a trouser weight fabric too! Since this pattern is so "plain" it will be a nice pattern to use as a base for other styles (change the leg cut, add pockets, etc.)

Next up is this top from 6/08 BWOF, in white dotted swiss:

My muslin (which I used a fabric I totally love on, and am a little bitter about now) wasn't much of a success. I wouldn't term it a complete wadder, but I'll probably never wear it so I didn't do any finishing details. I found the chest/bust area to be really snug. Definitely a smaller fit than the last top I made in this size (I would classify this one as a definite B cup pattern.)

I also think the pleats plus gathered side casing is repetitive and not really all that noticable in the finished product, so I'll just be doing the casing. The casing itself is positioned too high for my waist, so I'll be lowering that. I've had it cut out for 2 days, but things are just slow around here this week. Hopefully I'll finish it today!