Monday, August 31, 2009

this...

is stunning.


It's from J Peterman and $229. So probably not in my current budget. But oh, how I lust. Pondering its recreation, I remembered this BWOF top from last fall:

Not exactly it, but a possible starting point. A true vintage pattern may be a better starting point, but my stash of vintage is 1940s, and this dress has a very 30's feel. I'm actually curious if I could self draft this, based off of a combo of peasant top and button front top patterns.

I have this pattern from Children's Corner from when Lu was small:


Note that it's a round yoke (albeit much shallower than the dress above) with gathered sleeve/bodice. I think the yoke/gathered bodice concept for the dress (in my size of course) would be the same. The yoke itself should be easy enough to draft off of a well fitting woven shirt.

In theory, that is.

My other option is to look at a true vintage pattern. If only I could get my hands on this one, a 1930s Butterick #6432. It's sold though (on sovintagepatterns.com). But wow, its close.


Hmmm. I'll keep you posted if I come up with anything better.

I'm considering the wardrobe contest over at PR. I know some of you are too! The only thing holding me back (it's a long contest, 3 months!) is the fact that once I finalize a plan I typically lose all interest in working on it. So we'll just have to see if I can make one and stick to it. Seeing as I just got my mojo kickstarted, I'm sorta loathe to jinx it now!

But be on the lookout for a potential storyboard this week anyway!

Sunday, August 30, 2009

Mac Storyboard Tute

I get requests for this one all the time. My original storyboard tutorial was done on a PC with Paint.Net, a free program (that is, btw, awesome.) You can find the original HERE (it's also linked in my sidebar on the right.)

Unfortunately Paint.Net isn't available for the Mac, and probably never will be. Your Mac does come with a very decent photo editor, however, called Preview. I'm going to use Preview today to show you how to create my storyboard tutorial. It's a few more steps than the Paint.Net version, since we don't have the same layer abilities...but the end result is the same!

If Preview is not located on your Dock, go to Applications and scroll down til you find it!

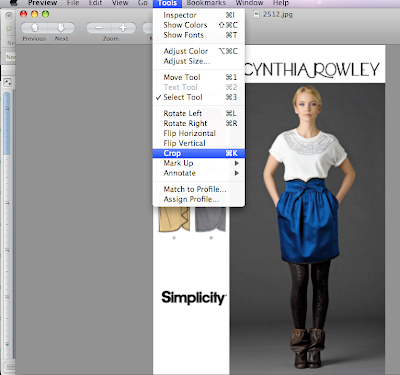
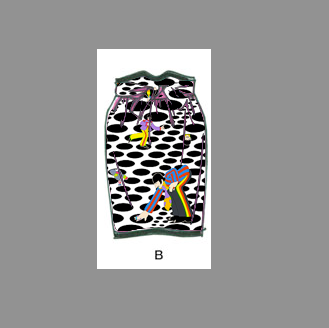
To start, open a picture of the line drawing you want to use in your storyboard. I'm using an image from the (awful) new Simplicity website, since they no longer have the line drawings (grrr.) This particular pattern does feature illustrated drawings on the pattern cover.

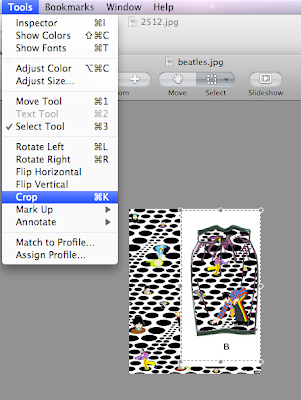
First we're going to use the Rectangular Selection tool (see below) to draw a rectangle around the skirt illustration that I'm planning to use:

Once the rectangle is drawn around the skirt, we'll crop out everything else. (Tools > Crop, or just hit the crop button if its on your toolbar.) **NOTE: You can customize your Preview toolbar to include most-used things. Go to View > Customize Toolbar> and in the popup box drag the tools you like onto your Preview toolbar. Click Done.


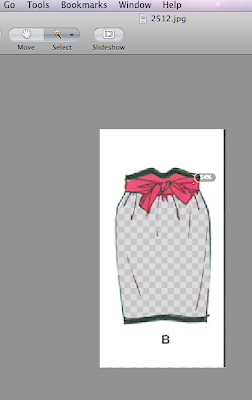
Now we just have our skirt illustration, but its filled with pink and I want to fill it with a fabric I have a picture saved of. So we're going to use another selection tool. This one is called "Instant Alpha" and it's under the select dropdown menu. It's similar to the "Magic Wand" in other programs, but this one works in percentages.


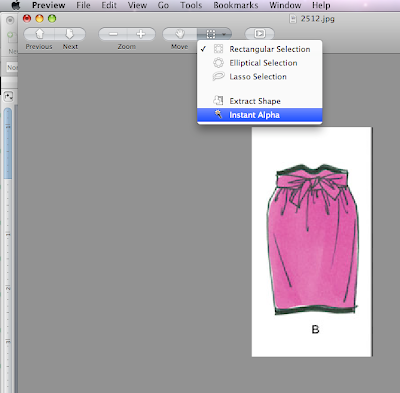
Click it and drag over the part you want to get rid of (in my case, the pink). You'll see it sort of "fill in" with a selection color (a transparent red).


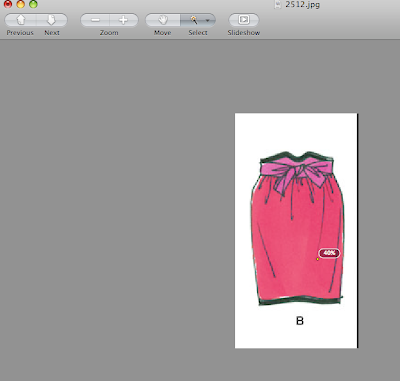
Press the RETURN key (enter) on your keyboard and the highlighted portion will be deleted. (You get a little popup reminder box to tell you how to do this, which helps!)


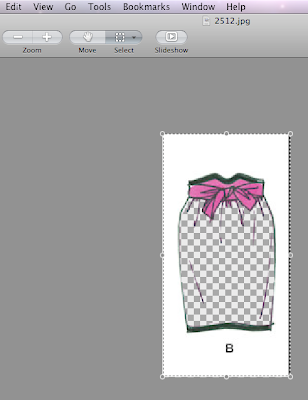
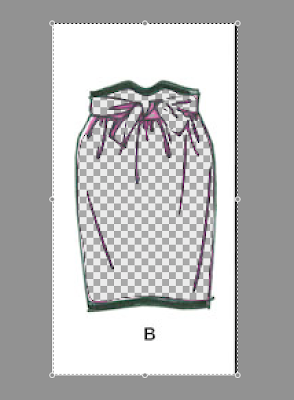
If you don't get the checkerboard background (which just means "transparent") go to View and see if you have Show Image Background checked/unchecked. You may have to click on that to get the checkerboard to show (to remove the background when you hit Return). Repeat with the remainder of the parts you want to remove:


I still have bits and pieces of pink, but once I get my "fabric" added, it won't be that noticeable. And, hopefully you'll be working with a plain white filled line drawing, which is much easier than these goofy illustrated ones! Here's my "empty" line drawing of the skirt:


Now we're going to open the image of our fabric. I chose this super cool Beatles retro print:


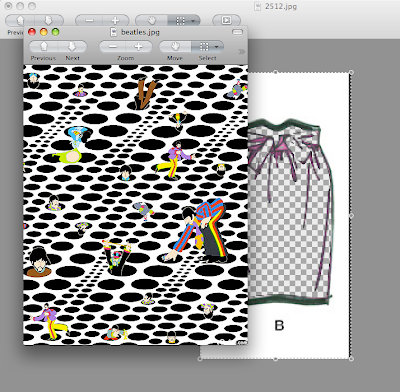
This is the part where we wish we had layers! But all is not lost, just because we don't have a traditional layer mechanism. Go to your skirt image and use the rectangle selection tool to draw a selection all around it. Command-C to copy it. (or Edit > Copy)


Flip back to your Fabric (Beatles) image and paste it (Command-V is paste, or Edit > Paste). Voila! We cheated a layer! We're so smart.


Now go ahead and use the Rectangle Select to draw a selection around just your skirt portion and Crop it:


So we have just our fabric-filled skirt:


Now here's where the real tomfoolery begins. Open an image that is large enough to be your storyboard "canvas". By this, I mean, wide enough and tall enough to hold all your pattern images, text, etc. Probably at least 800 pixels wide by 600 high. Anything smaller is going to be pretty small, but this size is a good size to upload easily to a message board, etc. and still be large enough to "see" detail. You can of course go much larger and then resize a copy to use for uploading too (just name it something different. I add an "sm" to the end of the file name.)

I opened an 800 pixel wide Vogue photo I had. The actual photo DOESN'T MATTER. We just want the dimensions to use for a blank canvas. If we had the ability in Preview to "create" an original blank image (like most "paint" programs) we would. In this case, we're just going to create one using a premade image.

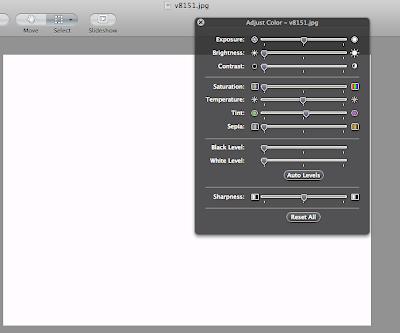
Go to Tools > Adjust Color


In the Adjust Color dialog box, play with the sliders until you lose all color in your image (making it entirely white, or entirely black might be cool too.) The sliders that are your friend for this: Contrast, Brightness, Saturation, Black Level, and White Level. You can see my results below:


I created a blank 800 pixel image to make my storyboard, using a photo! Slick, huh?

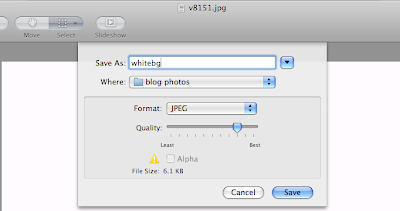
At this point I would save your background image as "background" or in my case "whitebg", so you have it preserved for another storyboard in the future.


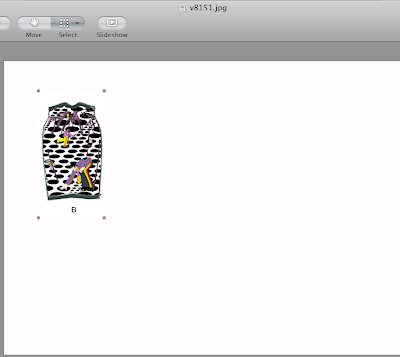
Ok, so now we're ready to start building our actual Storyboard. Go back to your cropped skirt image and select the whole thing with your rectangle select. COMMAND-C to copy. Click over to your white background and COMMAND-V to paste:


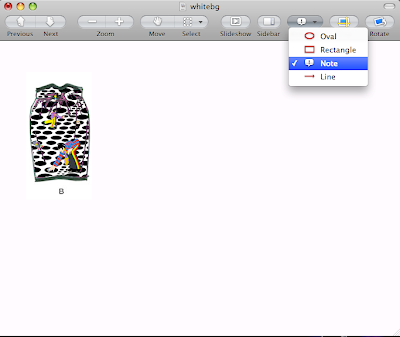
Now we just need to add text, because a Storyboard is inspirational only if you can remember what pattern you planned to use! For text, stop looking for the traditional "text" tool. There isn't one. Instead we're going to "Annotate". You can go to Tools > Annotate and choose "Note". If it is grayed out, use the directions above to add the annotation tool to your toolbar. It should work then.

From the Annotate menu choose Note:


Draw a rectangle where you'd like your text to appear and then type in your text:


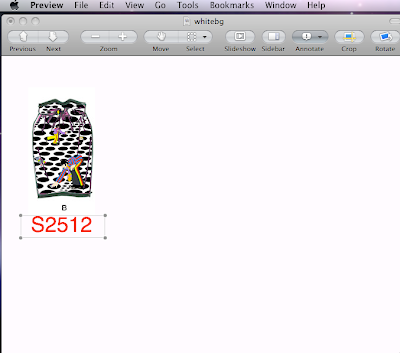
You do have ability to change font, font color, etc. That's all located under Tools > Show Fonts and Tools > Show Colors.

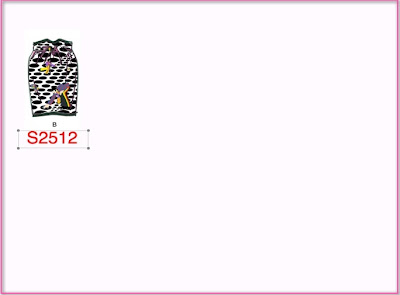
Here's the finished Storyboard, with a pink Annotated Rectangle drawn around the edge so you can see the dimensions:


I hope if you have a Mac, and don't have Photoshop or some other editing program that is Mac-compatible, you'll give Preview a try! A couple more tips...

You could just make all of your patterns with fabric images in Preview, then insert them into a Word document, or a PowerPoint slide. You could also try one of the free, or inexpensive Mac compatible photo editing programs. A free one that is limited, but has layers and a magic wand (really all you need for a storyboard) is Seashore. A minimal cost program that has great reviews is Pixelmator ($59 US).

Saturday, August 29, 2009

the unkindness of nonstrangers

I keep this Maya Angelou quote with me, at all times:

“I've learned that people will forget what you said, people will forget what you did, but people will never forget how you made them feel.”

I find this to be profoundly true. People are harsh creatures.

Above my bed I keep this, by Eleanor Roosevelt:
“No one can make you feel inferior without your consent.”

I think that sometimes people who routinely try to be kind to others…perhaps they do know when they are not quite making it. Perhaps it bothers them afterward. But perhaps not. Maybe this only applies if they care about the person they’ve been unkind to. Is kindness disposable? Are people?

This week, as I freight train toward an unhappy anniversary, my thoughts and emotions have been in a turmoil. I’ve snapped for no reason, lost my temper on occasion, and been especially tender when those around me have been thoughtless or unkind.

How wonderful it would be if whenever you were having a bad day, or week, or fortnight…those around you would just “know” and be a tiny bit gentler.

But I guess you really wouldn’t grow much as a person, would you? (And I know. It’s a crying shame my first post after hiatus isn’t cheerier. But thoughtful posts have their place too.)

And Mr. X…a fruit basket for you.

Saturday, August 22, 2009

hiatusville.

I'm so tired! I haven't had the energy to do much more than sit and read or watch mind-numbing tv the past two weeks. In light of that, and my lack of sewing time, I thought I'd drop in and let you all know I'm enjoying myself and having a bit of a hiatus from the old blog.

I've never taken time off blogging and I've been doing this since early 2006...so maybe its time to have a wee vacation. Not too long of course because I'd miss you all! But I'm tapped and without much to offer in the way of bloggy goodness.

Don't go breaking my heart by dropping me from your feeds now, you hear? The sewing and other crafty, snarky fun will return in a week or two!

Sunday, August 16, 2009

dress envy

Have you been watching Drop Dead Diva? I am really enjoying this cute little show on the girl network, Lifetime. Great getaway hour! And the heroine, "Jane" is adorable. It's worth noting that she's not a walking hanger and is just as cute as she can be! How refreshing.


Last week Jane wore this fabulous pink & black dress and I've been searching for a pattern ever since. Here are some snaps of various quality/closeup-ness.

The dress has a button front placket and a collar:


and a really great swishy skirt:


Jane wore it with a black patent belt:


and little cap sleeves. Isn't it (and she) adorable??


Any pattern suggestions?? Would be awesome if it was BWOF, but I'll take anything at this point. It just seems like I've seen a similar shirt dress pattern SOMEWHERE.

Tuesday, August 11, 2009

BWOF 8-06-133 & a fake

Ok, just to prove I really HAVE been sewing a bit here and there the past couple of weeks...here are two skirts I finished recently. This one is from the 8/06 issue of BWOF and is #133. Here's the line drawing. (I really like the top too!)


It's a really pretty gore skirt, and I made it in a burgandy & cream "tweed" -ish fabric, lined in a poly charmeuse in gold. I used a lapped zipper because I didn't have an invisible zip on hand and wanted to finish it! I love it, but it will be put in the late fall/winter section of the closet for another couple of months I'm afraid. It's hot!

It did fit really well when I made it three weeks ago! But the first two weeks of school, we all have the bad habit of eating out for lunch every day. Something I just can't do without immediately noticing a change in my waistline (even though I worked my fanny off most days in the classroom moving, arranging furniture, etc.) So now my skirt is the tiniest bit tight through the middle (versus perfect, leaning towards a tiny bit loose when I made it). Grrr. It will go away once I'm back at school for "real".

Tweedy fabric:


Gold lining:

(these shoes are painful, but gorgeous!)

Next I made a skirt I've wanted to do for a long time now. This skirt is based off of the BWOF 5/07 #105 "sailor skirt":

I really liked the sailor effect of the button on portion, and the wide ruffle at the hem. I changed it up a little since I probably won't be tucking in a top with this skirt (or any other for that matter) and I didn't need the button on flap to be functional. Here's my variation (in wrinkly white linen):


Sorry I didn't press it before taking the picture! I was in a hurry because I was losing light and my camera batteries are still pretty much D.E.D. I still think you can tell its a cute skirt! I LOVE the ruffle. It's awesome and flippy.

I used my Sew What Skirts a-line pattern for the front, and cut a center front panel plus seam allowances, then cut two side panels to create the front with the topstitched seams. The topstitching is navy double row. The buttons are non-functioning! I just stitched them on after checking placement in the mirror (after sewing the center & side panels together for the front).

There are darts in front also, to improve fit. Topstitching and super cute navy buttons:


I interlined this 100% white linen with cotton voile rather than lining. The skirt portion itself is pretty short, before you attach the ruffle. The ruffle isn't lined.

Instead of a waistband, I used a facing, since I don't plan to tuck in. I used my skirt pattern piece to draw a facing pattern for front & back. I should mention that used my Sew What Skirts gathered skirt pattern for the back of the skirt, and added an elastic waist rather than a zip. I actually used a "facing" to make the casing too, rather than turning under and stitching. This allowed me to sew the front & back facings together at sides before attaching, for a clean finish at the side seams & top of the skirt.

Then I stitched the back facing in place, to form a casing for my 1" elastic. After I pulled the elastic through the "casing" row in the back, I stitched in the ditch through the side seams to catch the elastic on both sides. Then I tacked the facing in on the side seams, and on the front, tacking the facing to the interlining.

The fake sailor buttoned placket is cute, but my top (when not tucked in) covers up the top button. Shoot. I don't like things in 2's. I wanted the 3's!! Ah well, I'll still be wearing this, hopefully with a navy & white striped Weekender Cabana Tee that I've had lying here cut out for a few days now! (AND my hot red shoes!)

(These shoes are gorgeous and completely comfy!)

Sorry to report that I haven't found my energy stores so there isn't much sewing and blogging or blog-reading going on right now. Back to school is a killer!

Friday, August 07, 2009

don't you forget about me...

John Hughes has passed away. Where would I be without...

Sixteen Candles (my favorite!!!)


The Breakfast Club
(which Tina & I have seen a thousand times minimum)


Pretty in Pink (ditto)


Ferris Bueller's Day Off
(which I quote in class ALL the time, and get more shocked
every year when the number who "don't get it" increases.)

And let's not forget these Christmas classics which are must-see's (multiple times) at my house during the season:

Classic!


A Thanksgiving night ritual while we put up the tree.
My kids laugh hysterically EVERY time.


I do enjoy the original very much, but there's something
about this sweet remake that I love.

What a fabulous writer, director, producer...he was tuned in to MY life in the 80s, and the lives of every other kid I knew. A sad day indeed for the film community.

I'm back at school this week, so no sewing. But I did finish two skirts over the weekend I need to take photos of!! I tried this morning, but my camera batteries are dead. Grr. Maybe this weekend!