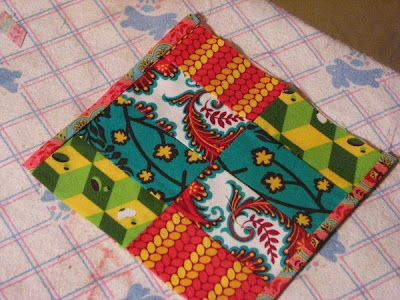
 And we're off! First, choose 4-8 patchwork friendly cotton prints. I used my old standby, charm packs from Moda. These are from the "Nest" charm pack by Tula Pink. You'll also need a bit larger scrap of fabric for the lining/bindings.
If you're using yardage, cut 4 strips 1-3/4 x 7 inches. OR if you are using charm packs like me, cut 8 strips 1-3/4 x 4 inches.

Seam your 4 strips together using 1/4" seams. I pressed one set of seams to the right, and the next set of seams to the left.

For the charm pack version, sew the two 4-strip sections together to make one long patchwork section. I flipped one over so that they are even more patchy & fun at the center seam!

Press this seam open!

Now we're ready for lining & bindings. I used my pieced section for the pattern piece.

Cut your lining piece the same width but 5/8" longer on each short end as shown below:

That extra length on each end will act as our binding! Yup, we're lining & binding in one step! Match one short end of the binding to the pieced section & stitch RST with 3/8"-1/2" seams (this depends on how wide you want your finished binding. I used 3/8") Next, pull the other end of the pieced section to the other end of the lining. (see below) Obviously the patchwork is quite a bit shorter than the lining so you'll have an odd bump out of fabric on bottom. You'll see the magic in the next step. Just go with it!

Turn your patchwork/lining right side out. You can already see the magic happening!

See how the extra length of lining acts as a "binding"? Press well!

With your patchwork facing up, bring the binding edges into the center. If you used the 4" pieces to start with, you'll have a nice center seam to match them up to! Pin in place along the short edge. You can also overlap the ends just a little for a snugger tissue cover.

Stitch across both ends!

Trim a little and finish up your seams with a wide zigzag. Mine was 5 width by 1.5 length.

Turn your pouch right sides out & poke/roll out the corners. There you have it! A really sweet patchwork tissue cover, perfect for anyone on your gift list!


I like that-- it's so fun and colorful. And I'm all about projects to use up the scraps!
ReplyDeleteI love it. I'm trying to come up with fun, quilty projects to fill the girls socks. By the way - your mat looks a little bit warped. g
ReplyDeleteSo cute! I wish my fabric store would put together cute packs of fabric. I have to buy an 1/8 of a yard if I want variety and I can never put them together that matchy-cute. Come visit me and put together packs.
ReplyDeleteCute cover! Thanks for this - I'm going to give it a try.
ReplyDeleteGreat project! Thanks for the excellent directions and photos.
ReplyDeleteLOVE that cover with built in binding! So clever!! Thanks for the tutorial :)
ReplyDeleteVery cute, I really love the scraps you used with it!
ReplyDeleteClever little covers!
ReplyDeleteThanks, I'll have to try it out! The fabric selection is so cute. :):):)
ReplyDeleteHugs,
Lory
Really cute! Those prints make the project "pop".
ReplyDeleteYay!! I just whipped one up in about 1/2 hour (except for a little seam ripping: RST.RST.RST.)
ReplyDeleteNow I have something extra for the teachers!
Love the binding.
On, yours are so cute! I think I might actually make some. Thanks!
ReplyDeleteThis would be the perfect gift for someone I know.
ReplyDeleteTFS
Bo
These are cute but I did not like the pattern. When I pull out a Kleenex, the whole pack comes out.
ReplyDeleteAny tips?
Lani- I had that problem with one brand of tissues, it was a bit difference size (narrower). You might try adjusting the size so the cover fits snugly around the tissues. Before completing the binding, wrap around your tissue pack and check to see if its going to fit nice & tight. Hope that helps!
ReplyDeleteThanks. I did make the holder smaller but still the same problem. I am not sure if it is because I took the tissue out of the plastic package.
ReplyDeleteI think I will have to put a button with a ribbon on it, like an old manila envelope style.